Google Tag Manager is a great tool that has a lot of opportunities for event tracking. If you are not familiar with this tool and have not used it before start with reading this article about basic concepts of Google Tag Manager. In this article, I will explain how to configure event tracking using Google Tag Manager easily.
An event can be sent to Google Analytics with any trigger. The most common case for event tracking is a click on some button or link.
Here are the steps on how to configure events for clicks on Read more button.
Create a new Google Analytics - Universal Analytics tag and select Track Type Event.
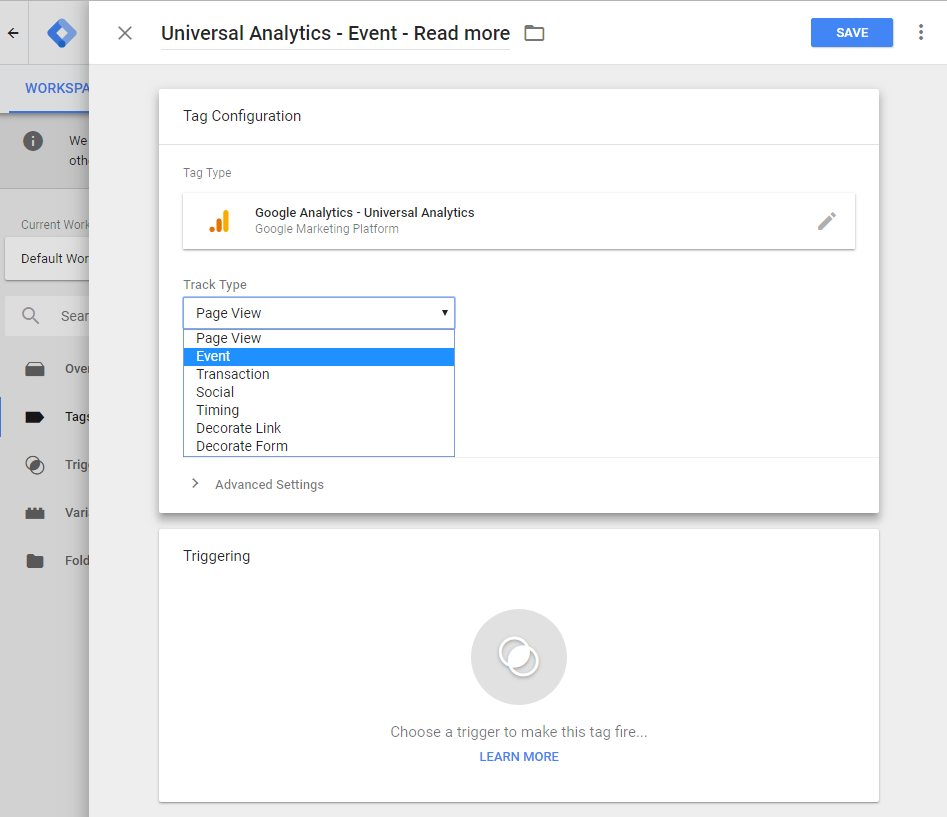
There you will see a list of Event Tracking Parameters
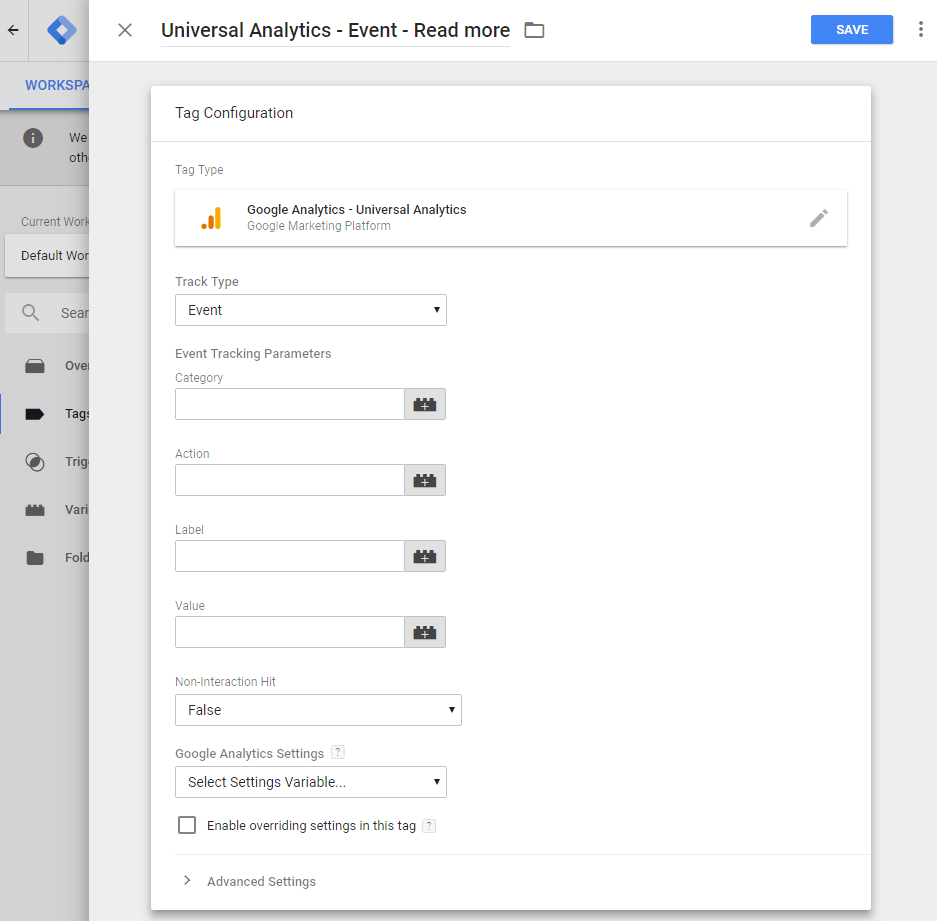
You technically it is necessary to fill at least one of them but it is a good idea to fill all in order to keep your data structured and better organized.
The Category is normally used to group different events. In case you are going to track multiple buttons on your site you can put something like “Button clicks” in the Category field.
The Action is normally used to describe a user's action. So we can name it “Click”. Later we may want to configure more actions for the same button (Impression, Hover, Focus, etc.)
The Label should have the name of the button in order to identify this particular button among other button clicks later. So we can put there “Read More”. It is also possible to use variables for any of these fields. For example, instead of writing “Read More” in the Label field we can put {{Click Text}} variable there. This variable will set the Label to be same as the text on our button. Using variables is good because we can track multiple buttons with the same tag and trigger and can easily identify the specific button click in Google Analytics later.
We can also assign some value to the event or leave this field empty. Assigning value is helpful for custom user activity evaluation systems. You can assign different values to clicks, form submissions, scrolling and other events and find your best and worst visitors based on the total event value in their sessions.
Non-Interaction Hit field is set to False by default. You need to change it to true in case the event happens without any user interaction and should not influence the bounce rate (for example, banner impression event). In our case with the button click, this should not be changed.
Further on you need to choose your Google Analytics Settings variable or create one. It is also possible to check Enable overriding settings in this tag and provide the Google Analytics setting in the tag directly but this is not a recommended option.
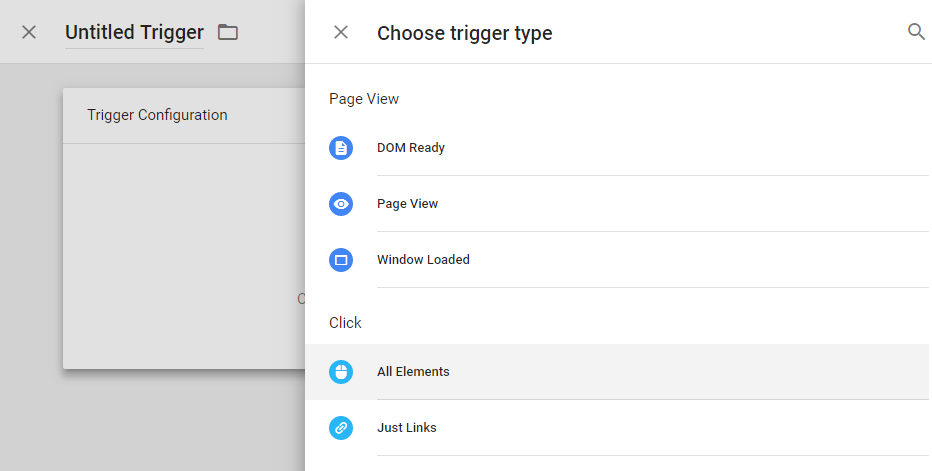
Click the triggering section and either choose a pre-configured trigger or create a new one.
To create a new trigger for this specific button click select Click > All Elements.
Switch to This trigger fires on Some Clicks and select the conditions for your trigger.
In case you are comfortable with CSS-selectors, choose Click Element matches CSS selector and provide the selector for your button.
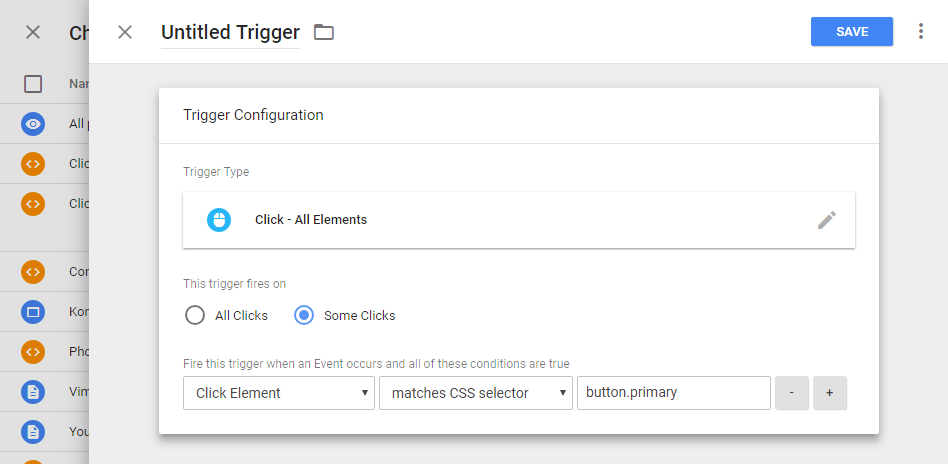
In case you are not comfortable with CSS-selectors it is not a problem. You have a number of other conditions. In our case, you can choose Click text contains Read More
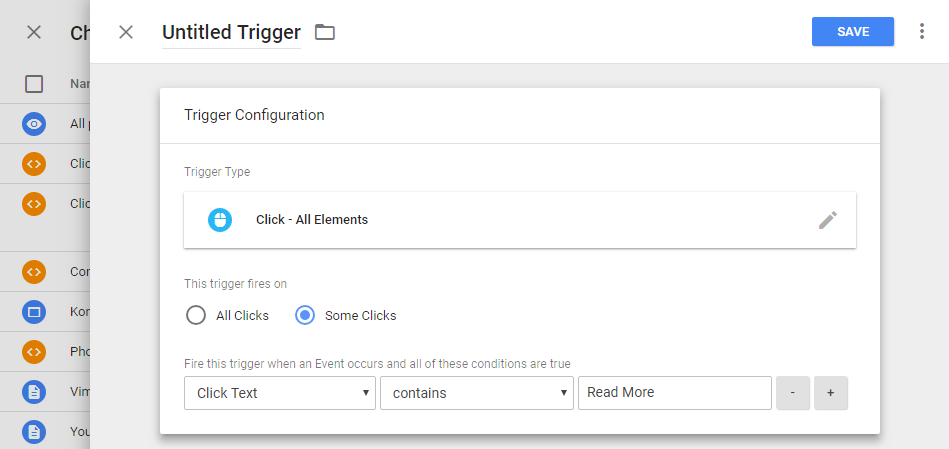
Once you are ready with the conditions provide a name for your trigger and click Save.
The trigger will be assigned to your Tag automatically. Save the tag and run your container in preview mode in order to check that everything is working as expected. Events may be associated with other user actions (scrolling, form submission, video events, link clicks, time on site, downloads, etc.) or interface events (JavaScript errors, banner impressions, automatics scrollings, popup impressions, etc.)

Leave a comment